Pages

Showing posts with label Household. Show all posts

1/19/11

I have conquered the star shaped afgan!

First off this pattern is from Beth at http://www.angelfire.com/va3/heartfeltangels/littlestarafghan.html

I know so many people out there have tried to make this style of afgan only to find that it buckles or puckers going up or down the points of the star. Well... I have great news. I will show you how to get your project to lay FLAT.

I have already done the first 3 rounds in the pattern but my instructions will help from 3rd round up. I think the first two rows are easy to understand.

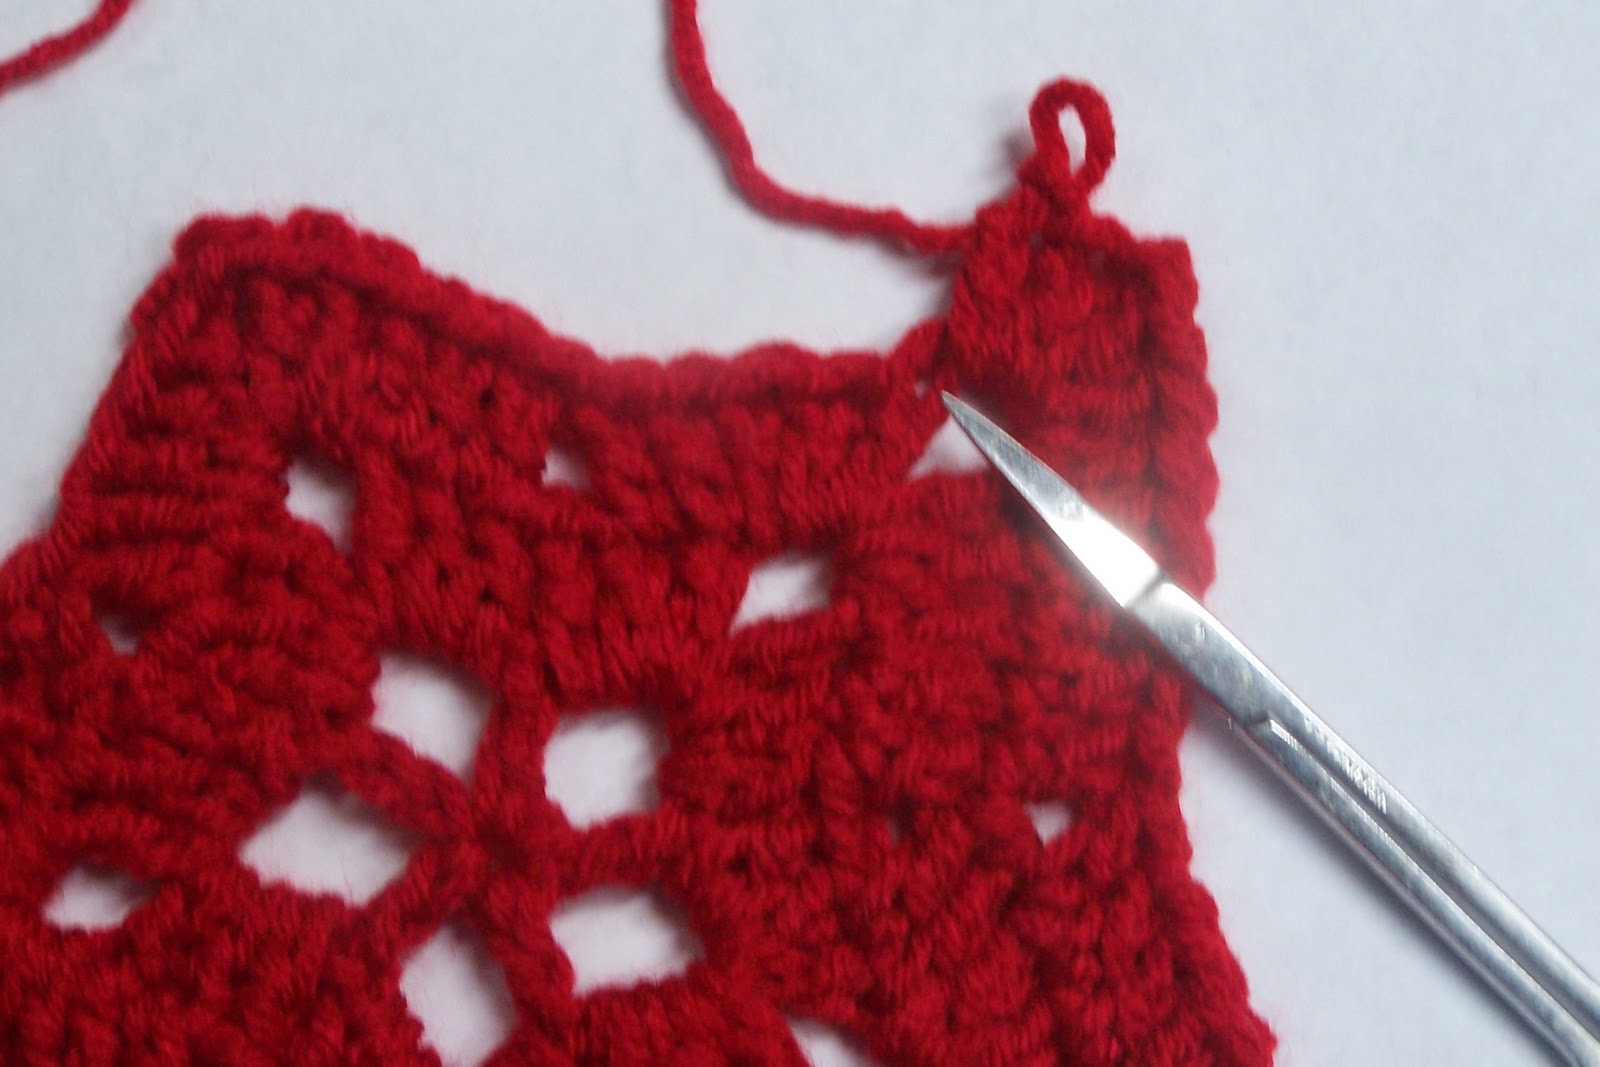
After you have done your first few steps in round 4 which are (sl st in next st, ch 3, 1 dc in next dc, shell) you will come to where the problems begin if you don't do this right.  The next step is to put 1 dc in the next (or first). The next dc is actually hiding behing your last dc in your previous shell. I have pointed it out with my scissors. It is to the right of the next dc in your previous round( round 3) Still, with me?

Place your dc in this space like I have in the picture.
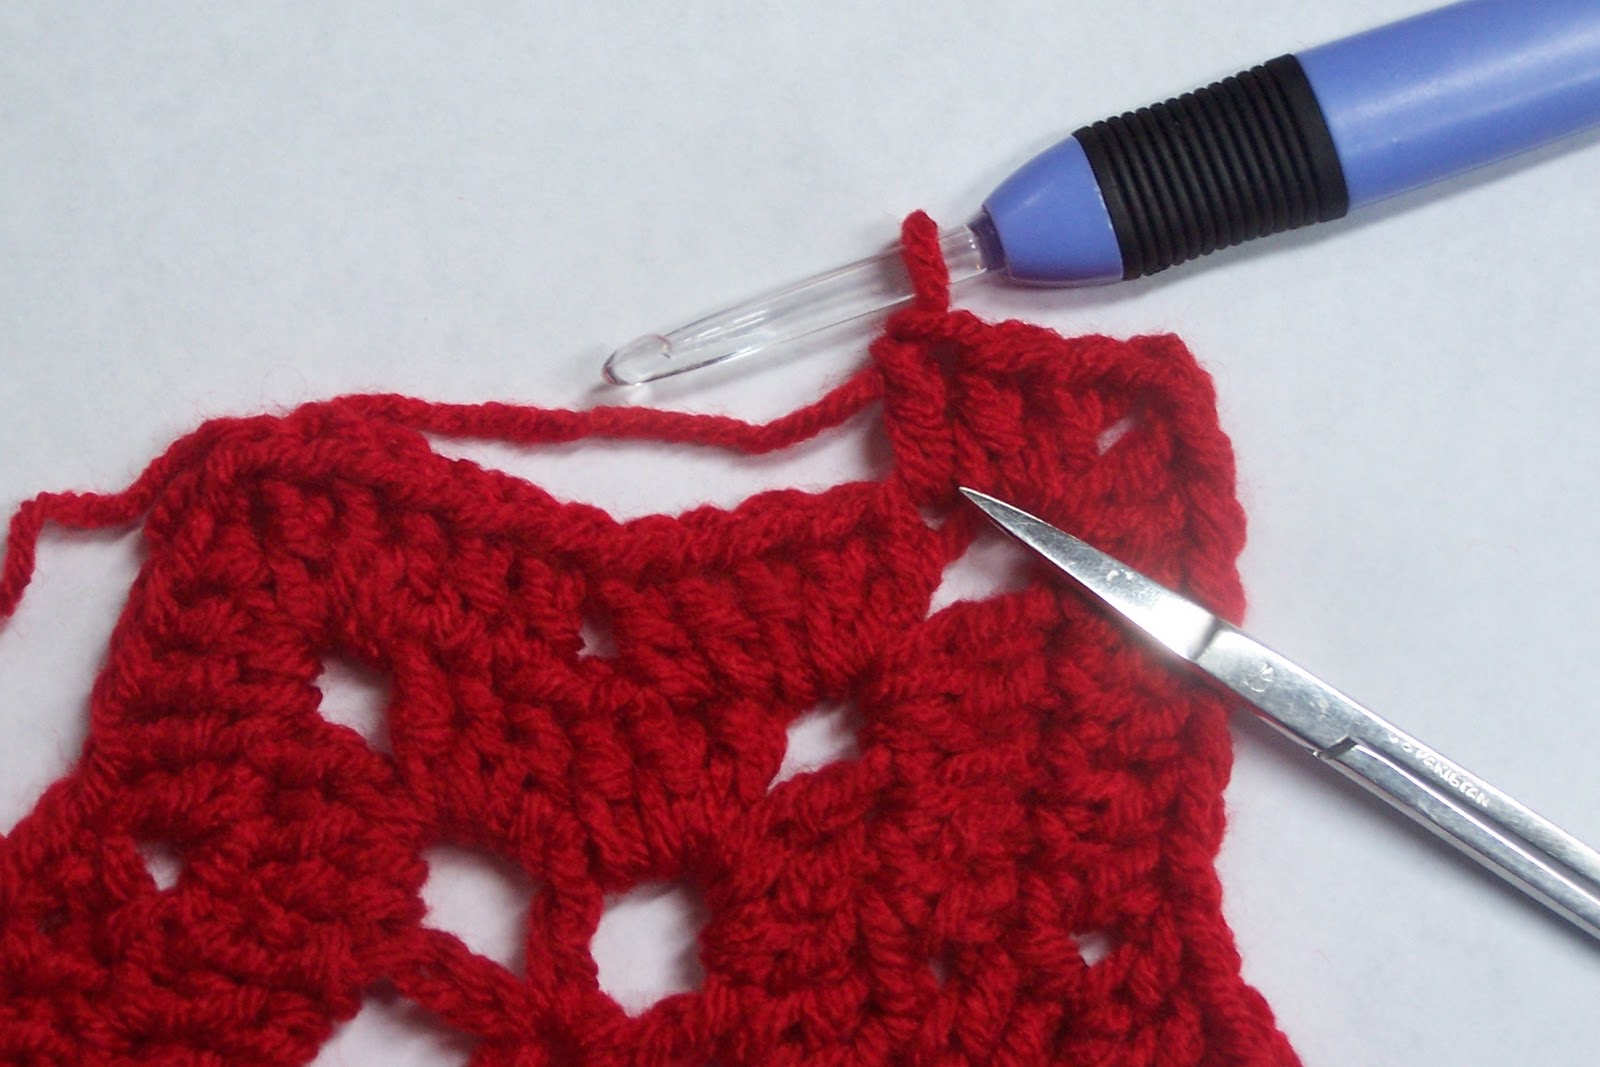
continue with putting a dc in the next 3 dc's. You should have 1 empty dc before you get to the hole or decrease step in your pattern. I have pointed this out with my scissors. You should also have 4 dc between this point and the shell you made previously.

Skip these next 2 dc ( one will be the "hole" ) and dc in the next dc from round 3. Or you can just count 3 stitches over and place your dc there. I have pointed this space out with my scissors.

place your dc here. You have now created the valley in your project.
dc in the next 3 dc from round 3 and then shell in the ch. 2 space. Continue around the star in this established pattern remembering where to put your first dc after the shell unti you get back to the begining.

slip stitch into the 3rd chain of the begining chain 3. I have pointed out the correct chain
with my scissors.
You will begin your next round by a slip stitch into the first or next dc. It is just to the left of your slip stitch. It kind of looks like the same stitch but it is not. I have pointed it out with my scissors. After you have slipped into this next dc, ch 3 and this will be your first dc in the next round. You will do this for every row here after. You will add 20 dc to every round. So in round 3 you will dc 2 before and after the shell and in round 4 you will dc 4 before and after the shell. Round 5: 6 dc before and after the shell, etc.

I hope this makes sense to you. It will lay flat if you follow these instructions. Enjoy!

11/4/10

New Series: Take & Make


Take & Make


Take & Make is a new series about recycling, upcycling or repurposing things you already have. We all have things, such as, old towels, or blue jeans that could be reused in very clever and usable ways.

So without further a do. I am going to start out the series by showing you different ways to repurpose an old bath towel. The colors of the towels are up to you and I do hope you enjoy it. All you need is simple sewing skills and a sewing machine.

PART 1
HOODED BATH TOWEL
There is a fabulous tutorial here or you can try and follow mine.

First I chose two old rattie towels to "try" this on so please, I know they don't match that well.

Supplies: 1 hand towel, 1 bath towel, sewing machine, scissors and pins
step 1: lay your hand towel horizontally on the table and cut in half. You will only use one half so this one hand towel actually makes 2 projects


step 2: Lay your bath towel horizontally on table and find the middle. Mark this with a pin. Next, find the middle of your hand towel and line it up with the middle of the bath towel and pin. You will then sew this where the two pieces meet along the top with about a 1/2 inch seam allowance. That is really up to you.


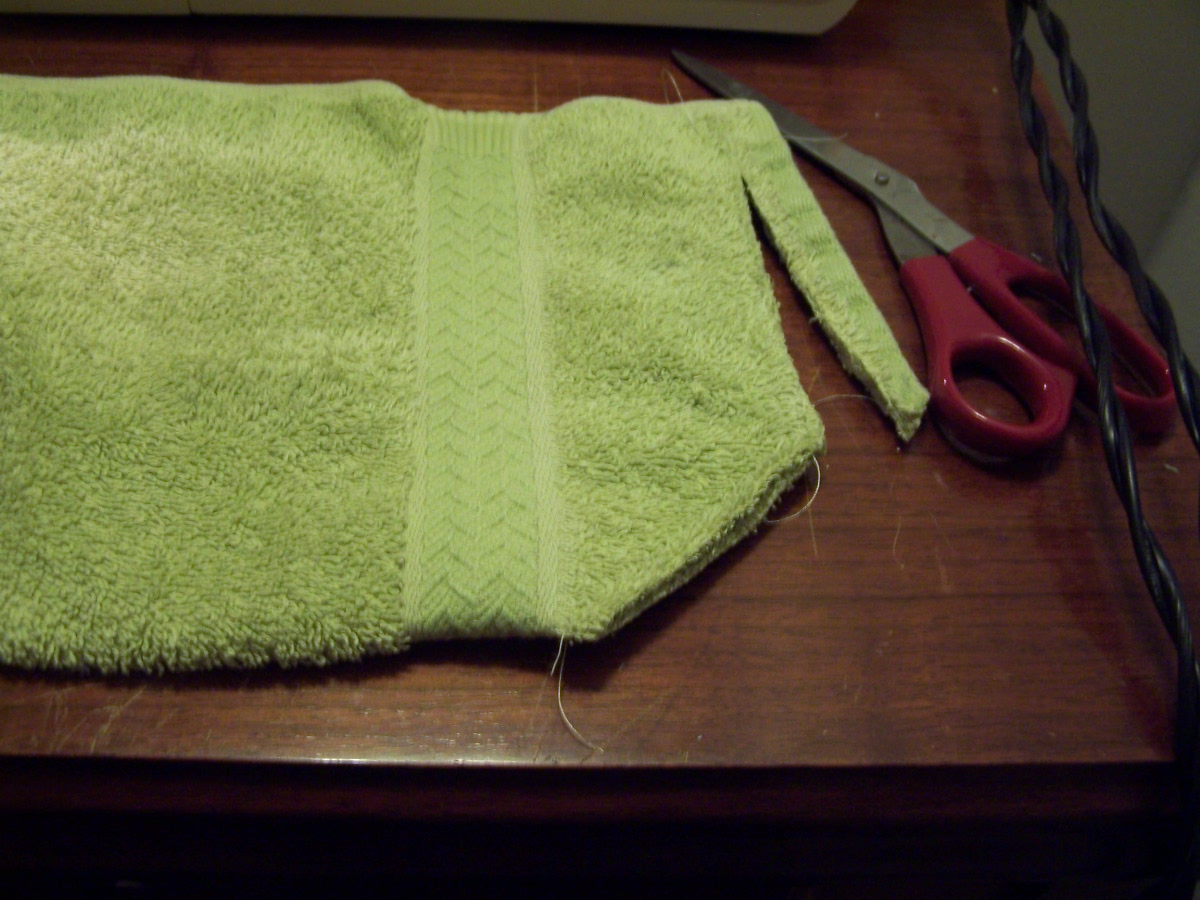
step 3: You will now take the two top corners of your had towel and bring them together an sew across the top. In the end you will have 1 long side open, 1 long side that is folded, and 1 top short side that you have just sewn. The other short side is attached to your bath towel. The next step is optional. Measure about 2 inches down from the folded side corner and sew diagonally . Then trim off the corner piece.


This is what the finished hood looks like
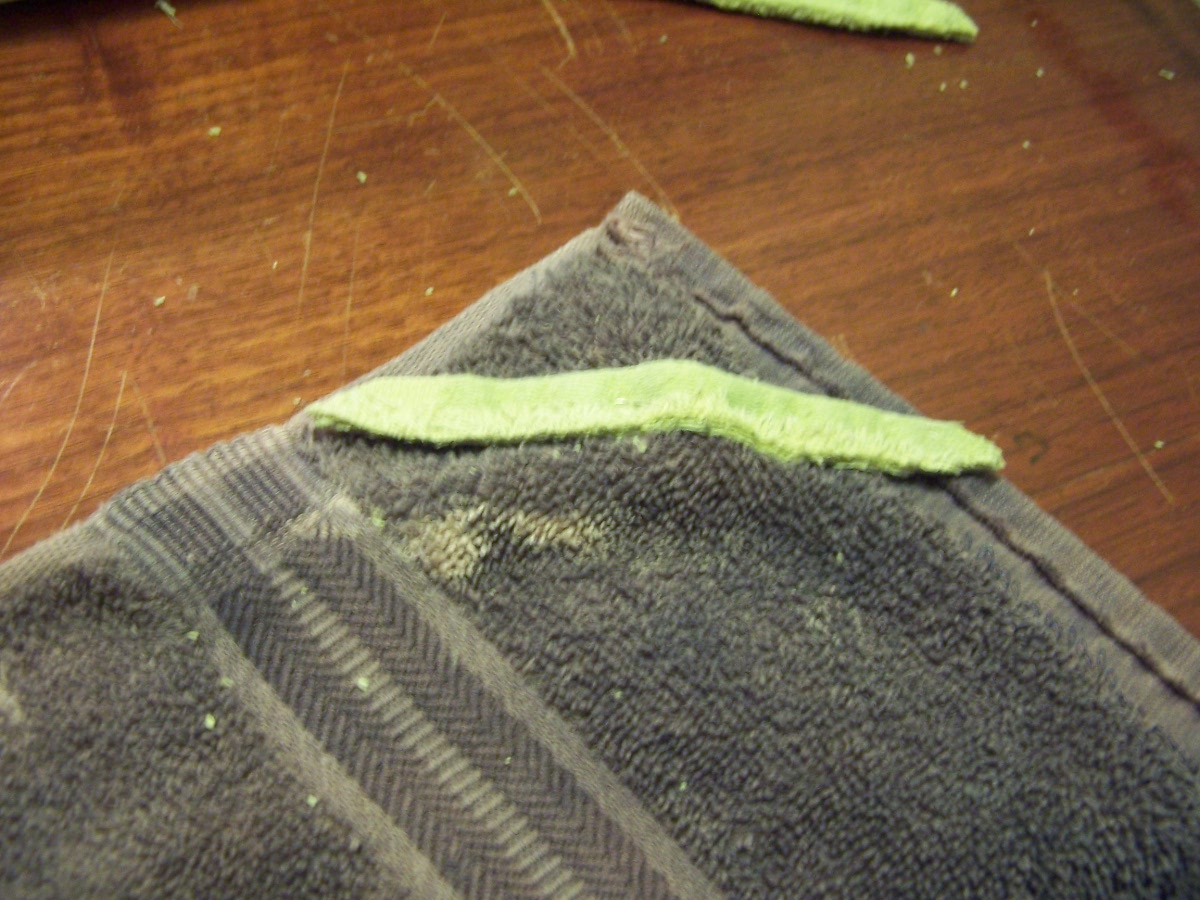
 Anothe optional step you can do is after you have sewn across the top of the hood, you can trim off the top (above the stitch line). You will have two pieces. I used these two pieces to add hooks for my kids hands in the corners of the bath towel.


Here is the final product withour the hand loops. It did turn out rather nice dispite the raggidy towels and mismatched colors.

Stay tuned for PART 2: SPA HEAD WRAP

9/19/10

Homemade Poptarts

I have been making these homemade poptarts for a few weeks now and my kids like them quite a bit. They are soooo much healthier than store bought poptarts. They are very versitile also, meaning you can put any "filling" inside them. Here is the link to the original recipe.

Here are some of my own pictures of how to make them and they actually look like hers. mostly.


I find it easiest to cut the top off first.
This is how I freeze them the second time around (after cutting). That way I can make sure they are matched up by size correctly. I also only make 6 squares from one ziploc bag of dough. I cut in half once from side to side. I then cut each on of those in 3rds. You should have 3 on top and 3 on bottom. The original recipe calls for more but I found them to be too small.


enjoy!

3/29/10

Homemade Laundry Detergent


About this time last year, I decided that enough was enough and I wanted to find an alternative to buying laundry detergent.  It just costs sooo much and lasts for maybe a month. That's $10-15 literally going down the drain every month. Well, I was through with buying it and determined to make my own.

Here is the recipe that I found works the best.


Home-made Laundry Soap Recipe :

1 bar Fels-naptha
1 cup Arm&Hammer Super Washing Soda
1 cup Borax
5 gallons and 4 cups HOT tap water (total)
1 5 gallon bucket with lid

*Grate bar of Fels-Naptha with Food processor or by hand with cheese grater.
*In medium sized saucepan, add grated soap and 4 cups water.  Cook over medium heat till melted, stirring often.
*While the soap is melting, fill 5 gallon bucket with 2.5 gallons of HOT tap water (half full). Add melted soap, Super Washing Soda and Borax to water and stir well till dissolved.
*Add 2.5 more gallons of HOT water. It should total 5 gallons of soap mixture. It will be quite heavy at this point.
*Cover tightly and let it sit overnight or until it thickens into a gel-like substance. Optional: you can add 10-15 drops of essential oil per 2 gallons of soap after it has cooled.
*Stir and fill a used, clean laundry soap dispenser (old tide bottle or the like) half full of soap. Fill the rest of the bottle with water.( 1 part soap/ 1 part water)
*Shake well before each use. Top load machine: 5/8 c. per load ( approx. 180 loads); Front load machine: 1/4 c. per load ( approx. 640 loads)

Yields 10 gallons of detergent.
Cost: less than $2 per recipe. This will be more for your initial recipe if you don't have the ingredients on hand already. Fels-naptha costs a little over $1, Arm&Hammer Super Washing Soda and Borax are $2-3 each.


I am not kidding when I say that I made this recipe in April or May of last year(2009) and I didn't need to make more until November. I do 10 or more load a week. You can always alter how much soap you need per load. I will never go back to buying laundry soap. This works just as well and the savings is incredible. You only pay about $2 for 6+ months of laundry soap. CRAZY!

Here is a link to 10 more Laundry soap recipes including powdered soap recipes.
Original recipe from Michelle Duggar